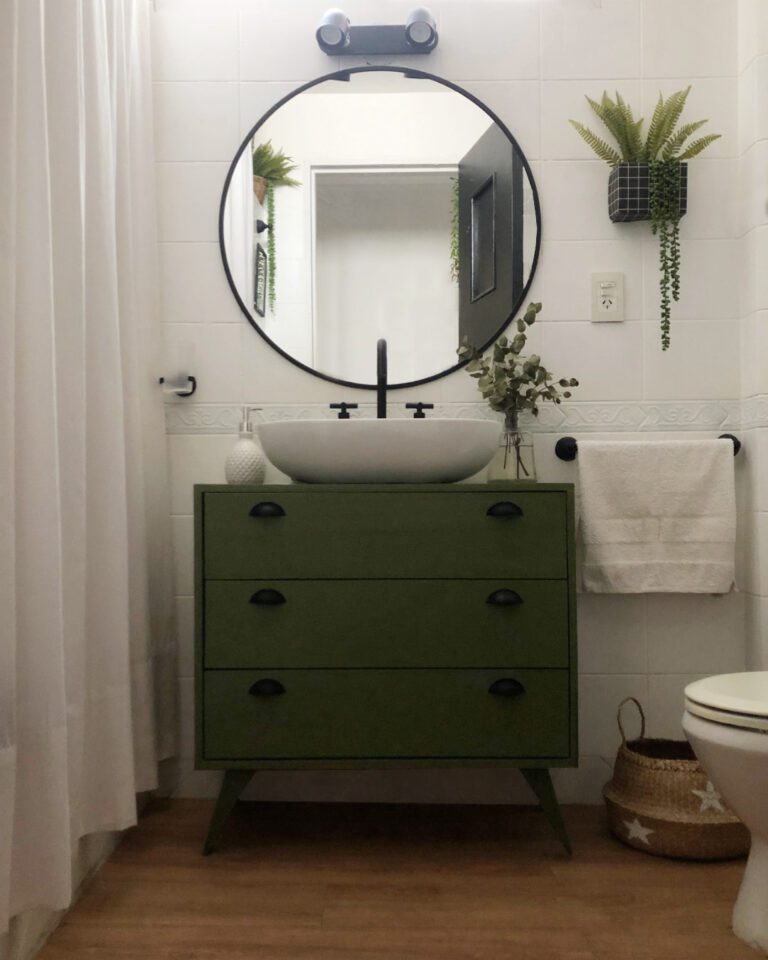
The first thing I did was to paint the ceiling. PRO TIP: when you are renovating a room, it’s ideal to start from top to bottom.
Then, I painted the tile. I used Sherwin Williams’ tile paint, but know there are more options available: Zinsser Bulls Eye 1-2-3 primer, and even chalk paint.
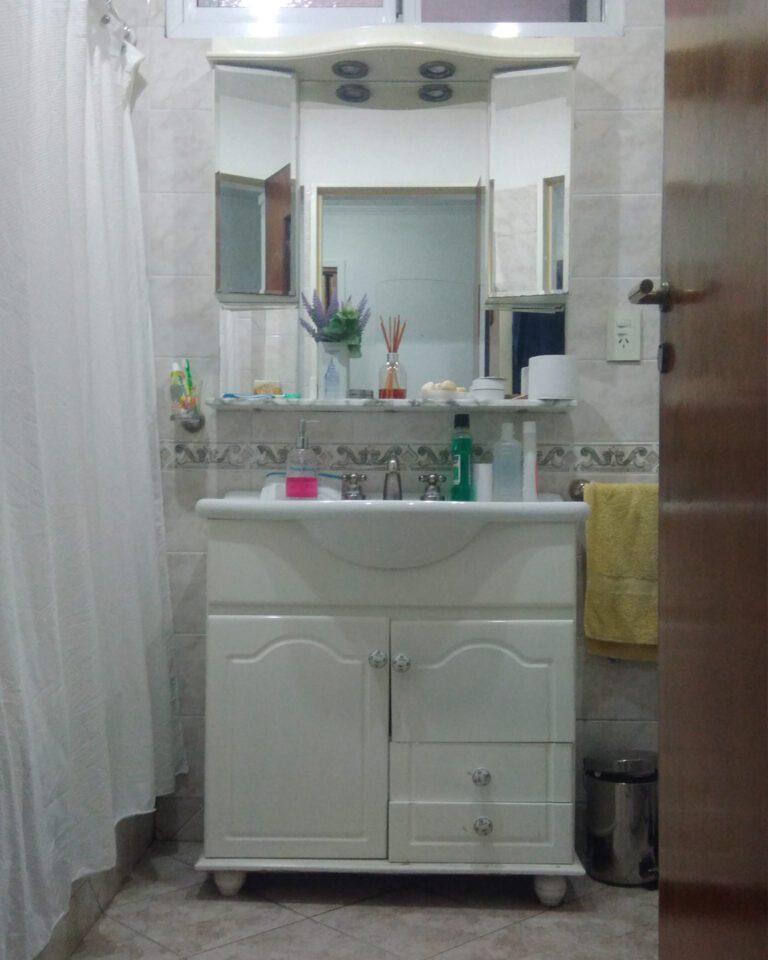
The next step was to take out the medicine cabinet and the built in lights. It was a little difficult because the screws were really old and rusted, and some even broke, but with some patience we were able to take it out. I replaced it with a round mirror (bought online) and a new light fixture. That change alone gave me a lot of faith in the final outcome.
Then, I had to take care of the vanity. I searched long a hard for one, but didn’t really like any of the options (or found them incredibly expensive). So I opted for buying an inexpensive pine dresser and a countertop basin. I drilled the holes I needed for the faucet and water line conections, and modified de drawers to accommodate the pipes. Also, I painted the dresser with synthetic enamel and installed new drawer pulls.
And finally, I took care of the floors. At first, I used some tile stickers, but they weren’t floor specific and the deteriorated over time (learn from my mistakes! haha), so I made the decision to install the same vynil planks as the rest of the house.
And that was it! The rest are decor touches.
If this transformation sparked your need to make some changes in your own home, I can help! Check out my online consultations.